Easy Crochet Hat: Free Beginner Pattern for The Shiloh Hat
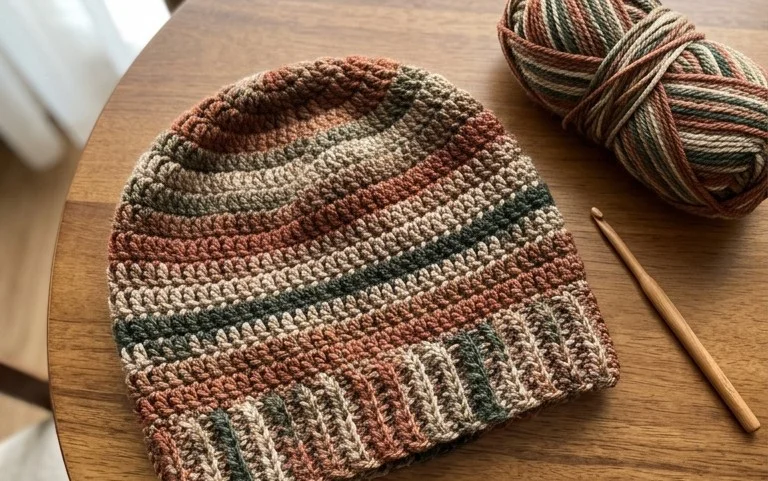
This beanie sits softly against your forehead with a dense, squishy texture that traps heat during biting wind chills. It relies on a simple back-loop single crochet stitch to build height, creating ridges that mimic high-end store versions without the complicated math or shaping. You start by working a simple rectangle, which means you spend your time building rhythm rather than counting complex increases or decreases at the crown. Beginners find this approach forgiving because the project relies on row-by-row consistency. It makes a thoughtful gift for friends or family, providing a handmade layer of warmth that holds its shape through many winters of regular wear.
Why You’ll Love This Pattern
This classic crochet beanie works up quickly using a simple ribbed construction that creates a stretchy, comfortable fit. Because it is worked as a flat rectangle and then seamed, you avoid the complexity of shaping rounds at the crown. The texture is consistent and squishy, providing excellent warmth for cold weather without being too heavy. It is an ideal project for using up partial skeins of leftover yarn from previous projects, as the stripe sequence can be adjusted to fit your available yardage.
I finished this hat in just one weekend and the ribbing makes it look much more professional than my previous projects. It fits perfectly and keeps its shape after several washes.
— Sarah, hobbyist crafter
Pattern Overview & Skill Level
- Skill Level: Beginner
- Approximate Time: 3 to 4 hours
- Construction: Worked flat in rows, then seamed to form a tube with one end gathered shut.
- Finished Dimensions: 9 inches tall by 8 inches wide, fits an average adult head size (20–22 inch circumference).
Materials & Supplies Needed
- Yarn: Worsted weight (#4), wool or acrylic blend, approximately 180 yards.
- Hook Size: 5.0 mm (US H-8).
- Notions: Tapestry needle for seaming and weaving in ends, locking stitch markers, and scissors.
- Safe yarn substitutions: Cotton blends are heavier and may result in a stiffer hat, while 100% acrylic yarns are soft and machine washable. If using a thinner sport weight yarn, increase your hook size and chain length to reach the desired width.
Stitch Guide & Abbreviations (US Terms)
- ch: Chain
- sc: Single crochet
- sl st: Slip stitch
- BLO: Back loop only. This creates the ribbed texture by inserting the hook under the back loop of the stitch from the previous row.
- st/sts: Stitch or stitches
- turn: Turn your work to begin the next row
Step-by-Step Pattern Instructions
Main Hat Body
- Row 1: Ch 41. Sc in second ch from hook and in each ch across. (40 sts)
- Row 2: Ch 1, turn. Work sc in BLO of every st across. (40 sts)
- Rows 3–60: Repeat Row 2 until the piece measures approximately 16 inches in length, ending on a wrong side row. Do not fasten off, leave a long tail for seaming.
Assembly and Finishing
- Fold the rectangle in half, matching the short ends together with the right side facing inward.
- Using the tapestry needle and the long yarn tail, whip stitch the two short ends together to create a tube.
- Weave the yarn through the stitches along the top edge of the tube. Pull the yarn tight to gather the fabric and close the hole completely.
- Secure the knot on the inside of the hat and weave in any remaining ends.
Care & Washing Instructions
- Hand wash in cool water using a mild wool detergent to maintain the integrity of the fibers.
- Lay the hat flat on a clean towel to air dry, reshaping it while damp to ensure the ribbing stays aligned.
- Avoid using a tumble dryer, as heat can shrink wool fibers and cause the acrylic components to lose their elasticity.
Pro Tips & Common Mistakes to Avoid
- Maintain consistent tension throughout the rows to prevent the edges of the hat from curling or flaring, which affects the fit.
- Place a stitch marker in the first and last stitch of every row to ensure your stitch count remains exactly 40, which prevents the edges from becoming uneven.
- When weaving in ends, run the tapestry needle through the base of the stitches on the inside of the hat for at least two inches to ensure the yarn does not pull out during wear.
- To adjust the size, add or subtract chains in multiples of two; adding chains will make the hat longer, while adding rows will make the circumference larger.
Frequently Asked Questions
Can I substitute a different yarn weight for this pattern?
Yes, but you will need to adjust your starting chain length to reach the desired height and add or subtract rows to fit your head circumference. Always check your gauge before starting.
Is this project suitable for a complete beginner?
This pattern is perfect for beginners because it uses only the single crochet stitch and works in a flat rectangle, removing the need to manage increases or decreases in the round.
How do I know if the hat will fit correctly?
Measure your head circumference and compare it to the width of your piece while it is slightly stretched. Since the ribbing is elastic, it should have a snug fit without feeling tight or pulling at your ears.
Am I allowed to sell hats made from this pattern?
You are welcome to sell finished items created from this pattern. Please credit the original design when listing your products online.
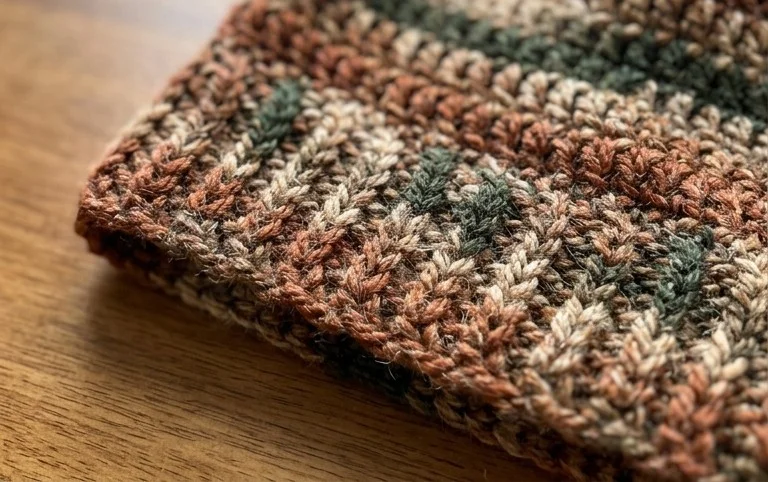
Your finished beanie provides a warm, reliable accessory for your next walk in the cold or a simple gift for a neighbor. Try swapping the worsted weight wool for a chunky cotton blend if you want more structure or a slightly different drape for warmer spring days. Sharing photos of your finished work helps others visualize their own potential results, so post a picture of your completed hat online. Please check the rest of the blog for more free patterns that follow this same straightforward, accessible style for your next weekend project.